How to back up your Bitwarden vault
- Blog
- How to back up your Bitwarden vault
Bitwarden vaults and all of the items stored within them are always securely saved to the cloud or your self-hosting instance. Because of that, each Bitwarden vault is always up-to-date and in-sync across desktop, mobile, and web. Even though you can trust that your vaults are safely stored, it is also a good idea to always have an up-to-date, local backup on hand.
One thing you should do before starting the backup process is carefully consider where you want to store this backup. Bitwarden allows for vaults to be exported as either CSV or JSON files. With JSON exports, there is an option to export an encrypted version of the vault.
What does that mean?
Simple. With the CSV or standard JSON options, the exported vault is unencrypted, which means anyone with access to the file could read it. Rather than storing it on a computer that can be accessed by multiple users, it is better to save an unencrypted file to a USB drive or other removable device, and store it in a secure location, like a physical safe.
If you export the vault as an encrypted JSON file, all password entries are encrypted, which means even if someone has access to the file, all they'll see for password entries are encryption strings. So, if you are unable to store the file in a physical safe, exporting it as an encrypted JSON file is recommended.
For those who prefer to export their vaults as a CSV file, there is another alternative explained below.
With that said, let's find out how to export your Bitwarden vault.
You can export your individual vault from any Bitwarden client. Note that for an organization vault, those can only be exported from the web app.
For this example, we’ll use the Bitwarden desktop app. You will also need a safe place to store the backup file. That's all!
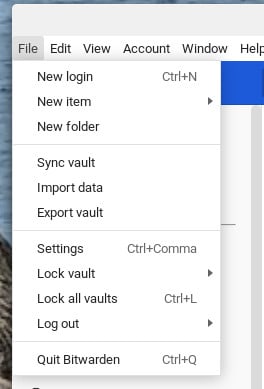
Before running the export, do a quick sync to make sure your most recent vault entries are successfully saved to your Bitwarden account. To do that, open the Bitwarden app and click File > Sync Vault (Figure 1).
Figure 1
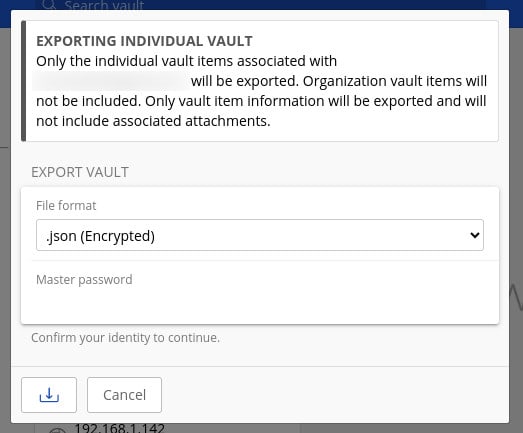
With the sync taken care of, click File > Export vault. In the resulting popup (Figure 2), select the type of file you want to house the backup (like the recommended encrypted JSON) from the File format drop-down.
Figure 2
If you go with .json (Encrypted), you have two options for how to encrypt your data. You can either select Account restricted, which uses your Bitwarden account encryption key. The caveat to using this option is that the file can only be re-imported to Bitwarden by the same account used to export it.
If you want an encrypted backup file with more flexibility, you'll want to select "Password protected" as the export type (Figure 3).
Figure 3

If you go with "Account restricted," you'll be required to type your master password or if you go with Password protected, you’ll need to enter and confirm the password you want to use for the file. Click the Export vault button in the bottom left corner (Figure 4), and, if you're saving this to a USB drive, make sure to select the drive from your file manager, and click Save.
Figure 4

Once the file has downloaded, you can safely remove the USB drive, place it in your safe, or another secure location, and you're good to go. If you're saving the file on your computer, it is recommended to save it in a less-than-obvious, or hidden, folder.
You now have a viable version of your Bitwarden vault that can then be imported, just in case you need it one day. Remember, if you add any new items or edit existing items in your vault post-export, you'll want to do another export so you have the latest information.
Note: You must already have a GPG key available for this to work. If you don't, you can generate one with:
gpg --expert --full-gen-key
How you encrypt a CSV file will depend on your operating system. For example, you could encrypt the file on Linux by using GPG like so:
gpg -c export.csv
The above command will create a new file with the .gpg extension. In the above case, the file name would be export.csv.gpg.
To decrypt the file, issue the command:
gpg export.csv.gpg
You'll be prompted for the password you created when you encrypted the file. One thing to keep in mind is that you should delete the original exported file, because it isn't encrypted.
To encrypt the file on MacOS:
Create a new folder.
Move the exported file into the new folder.
Use the Disk Utility to create a new image from the new folder.
Delete the original export file.
To password protect the file in Windows 11:
Create a new folder.
Move the unencrypted file into the folder.
Right-click the new folder.
Select "Show more options."
Go to Properties
Go to General > Advanced.
Check the box next to "Encrypt content to secure data."
Click OK.
When prompted, type and verify a password.
And that's all there is to exporting your Bitwarden vault. This is a great way to ensure you always have a working Bitwarden vault to access.
Ready to level up your security with Bitwarden? Sign up for a free Bitwarden account, or keep your team and company colleagues safe online by starting a 7-day free trial of our business plans.