What are Organizations in Bitwarden and why should you use them?
- Blog
- What are Organizations in Bitwarden and why should you use them?
Bitwarden. You know it, you use it, you love it. This handy password manager not only keeps your passwords locked up tight in a vault (for easy, but secure, access), it allows you to organize your passwords, generate strong, random passwords, and even share them with your teams.
And although the sharing of password entries with teams is simple, it does require you to take advantage of a very handy feature, called Organizations. With the help of Organizations, you can create an organization inside of your vault and then relate users and vault items together for the sharing of logins, notes, cards, and identities.
But what is an organization?
Simply put, an organization can be a team, a business, a family, or any set of users that require the sharing of data.
Before we dive down this rabbit hole, know that you can use Organizations with a free Bitwarden account, but this works with only two users (including yourself) and only two collections. To gain access to more collections/users, you need to purchase one of the following paid accounts:
Families $3.33/month—up to six users, unlimited Collections, plus premium features for all users.
Teams $4/user/month—unlimited users and Collections, plus premium features for all users.
Enterprise $6/user/month—unlimited users and Collections, plus premium features for all users, SSO Authentication.
Of course, with those paid accounts, you also receive advanced 2FA options, Bitwarden Authenticator (TOTP), Vault Health Reports, and 1GB of file attachment storage. And those features are available to every user enrolled in the Organization. Of course, whoever you enroll in the Organization must also have a Bitwarden account as well.
With that said, let me show you how easy it is to create an Organization and enroll users.
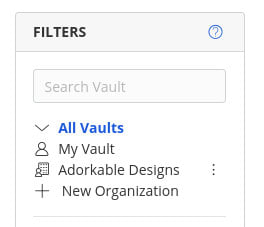
The first thing you should know is the creation of Organizations must be done within the Bitwarden web interface (you cannot create one in either the desktop or mobile client). So, log in to bitwarden.com with your account and then click New Organization under Vaults in the left navigation (Figure 1).
In the resulting window (Figure 2), type the name of your new organization as well as the billing email address associated with your account. Once you've taken care of that, click Submit at the bottom of the page.
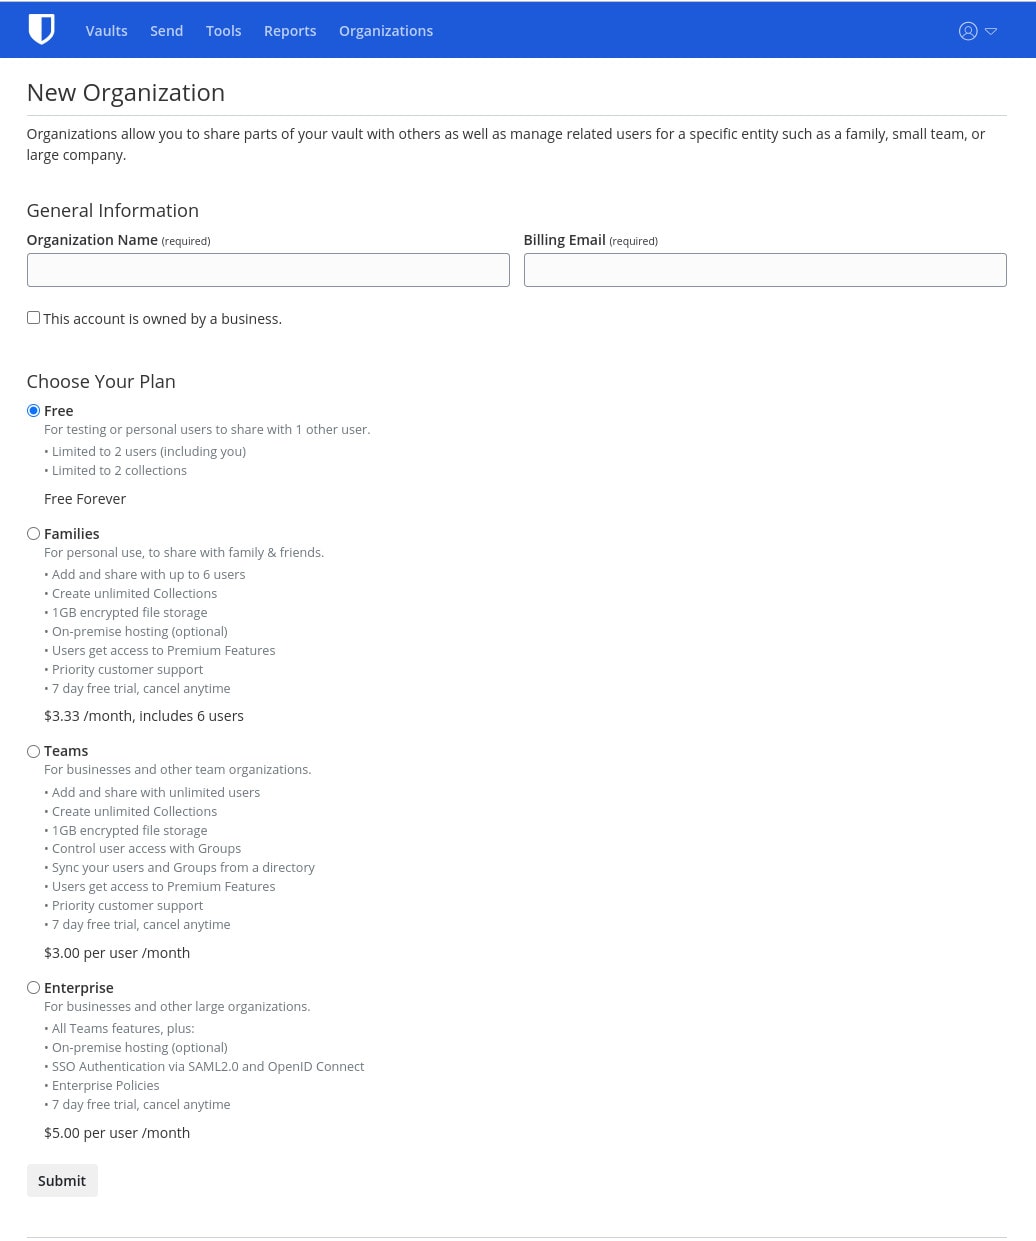
Adding a new organization in Bitwarden.
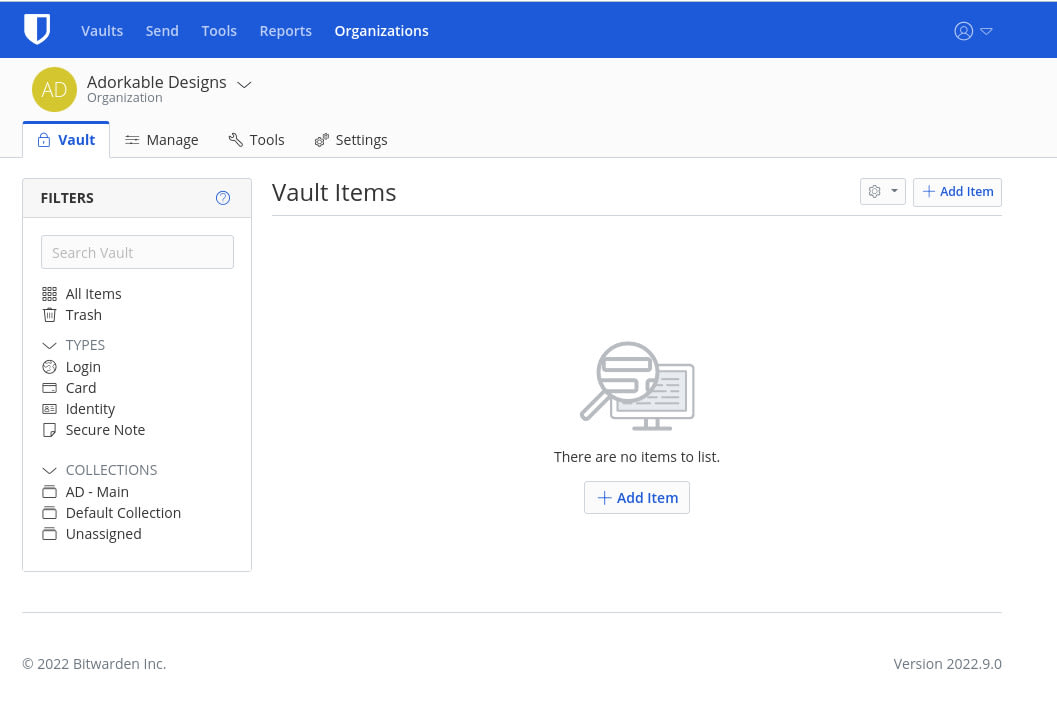
Once your organization has been created, click the Organizations tab in the top toolbar to reveal the home of your new Org (Figure 3).
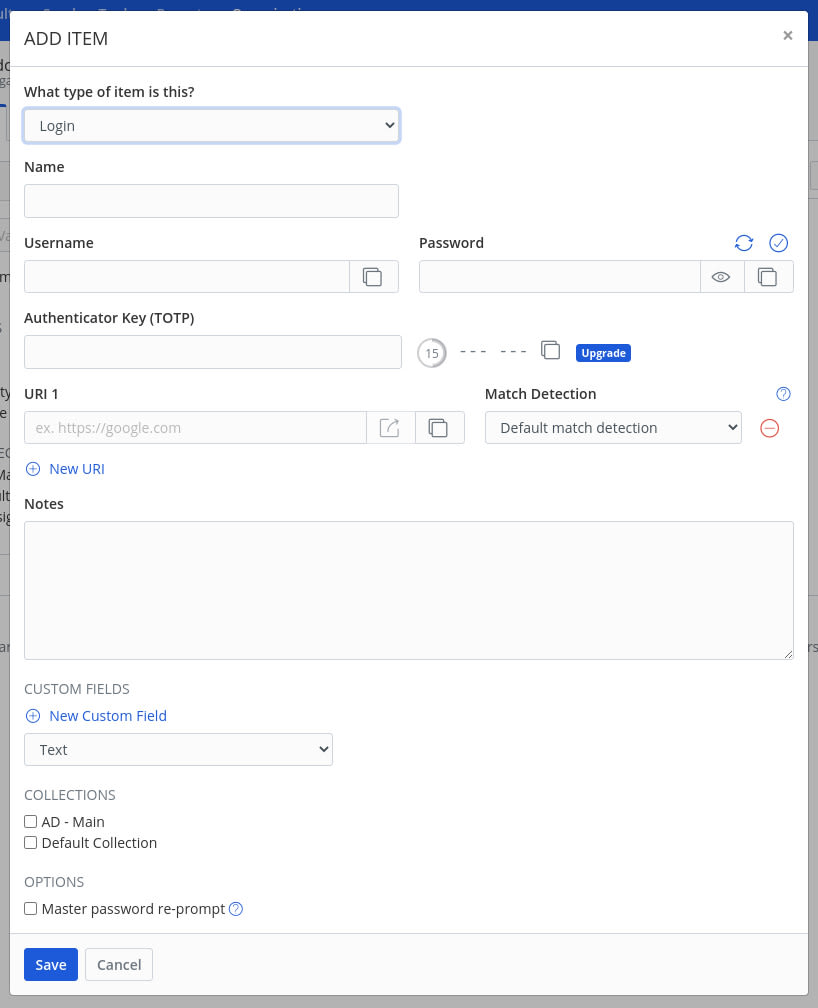
At this point, you can start adding items to your Organization. To do that, click Add Item and then, in the popup window (Figure 4), create the new entry.
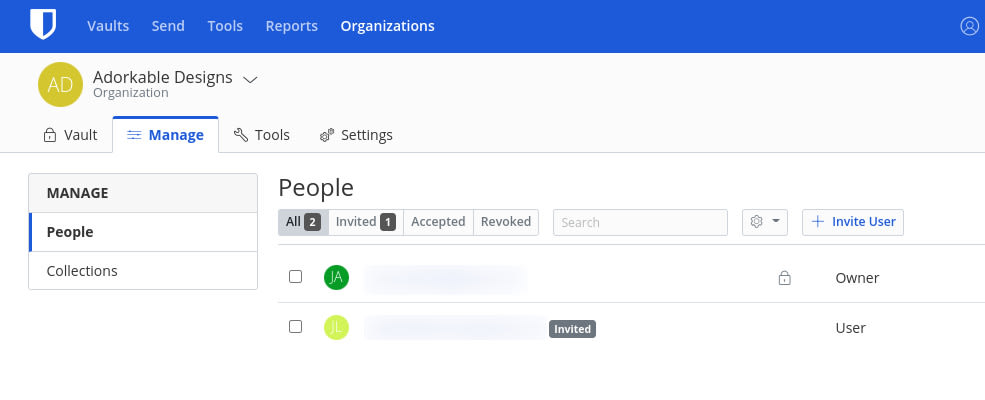
Once you've added all of the items to the new Organization, it's time to share it. In the Organization section, click the Manage tab and then click Invite User (Figure 5).
In the resulting popup (Figure 6), type the email address for the invitee, select the type of user, configure the access control, and then select a collection (if applicable) for the user to access.
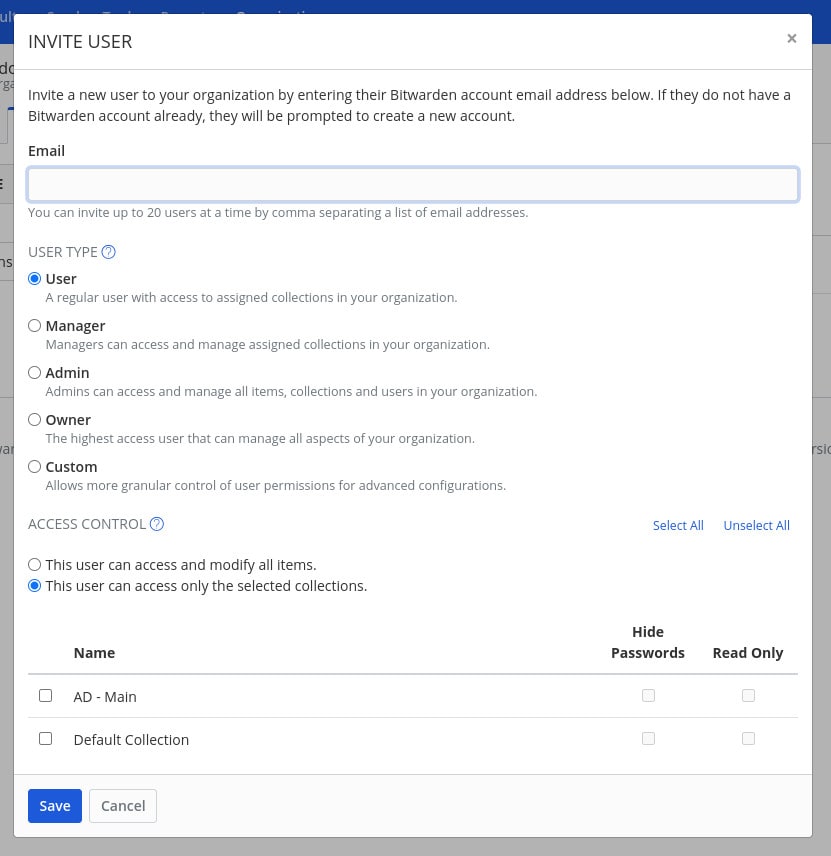
Make sure to at least give the invitee access to the main collection (so they'll have access to all of the items within.
Once you've configured the invitee, click Save and they'll be sent an email where they can accept the invitation to join the Organization.
Within an Organization, you can also create Collections, making it easy to organize items within your Organization. For example, you might create an Organization named Company X. Within that Organization, you might create collections for Dev, Admin, Marketing, Editorial, Management, etc. Each of those collections will contain specific items related to each department. By using this feature you can create a single Organization and then break it into departments (by way of Collections) and then share access to each collection with specific members of those departments.
To create a Collection, go to Organizations > Manage > Collections. In the Collections tab (Figure 7), click New Collection.

In the resulting popup, give your Collection a name and then click Save.
Once you've created your new Collection, you must assign an Item to that collection in the item creation popup. By adding an Item to a Collection, only those users who have access to that Collection will be able to access the Item.
And that is the what and the how of using Bitwarden Organizations. For anyone who needs to share Items with users, this feature should be considered a must-use.
Ready to level up your cybersecurity with Bitwarden? Sign up today for a free Bitwarden account, or start a 7-day free trial of our business plans so your team and company colleagues can stay safe online.
Jack Wallen is an award-winning author and avid supporter of open source technologies. He has covered open source, Linux, security, and more for publications including TechRepublic, CNET, ZDNet, The New Stack, Tech Target and many others since the 1990s in addition to writing over 50 novels.