Deploy Browser Extensions with Intune
When operating Bitwarden in a business setting, administrators may want to automate deployment of Bitwarden browser extensions to users with Microsoft Intune. This article will cover how to use Intune to deploy Bitwarden Password Manager browser extensions to your endpoints.
In order to deploy Bitwarden browser extensions using Intune, you'll need an extension ID and update URL. This identifier will be different for each browser:
Extension ID:
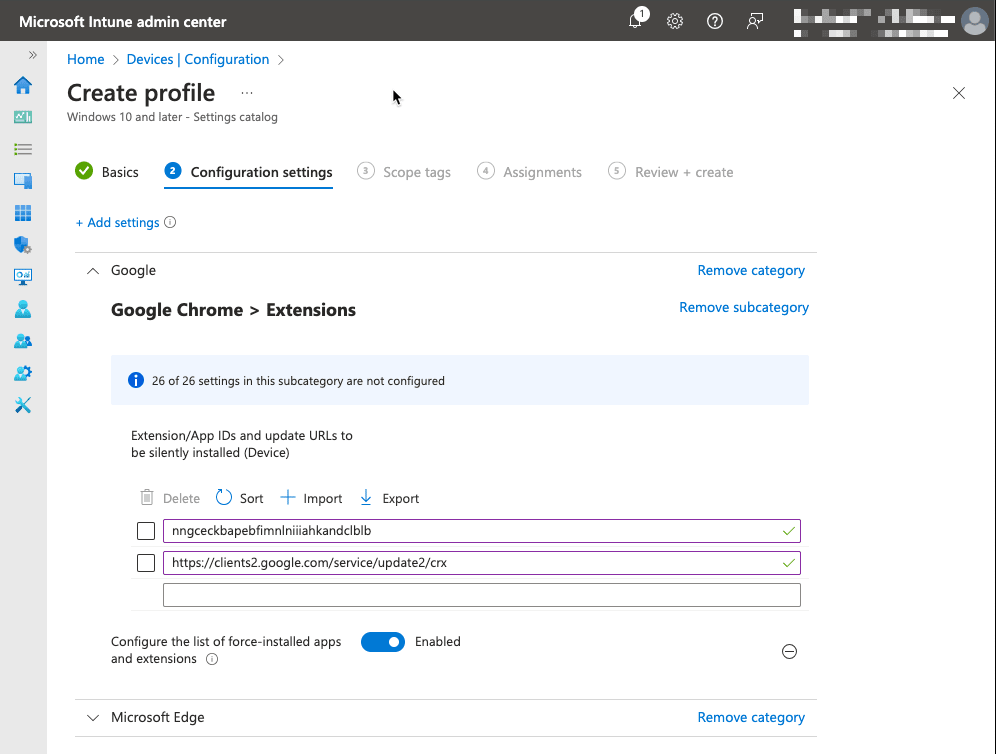
nngceckbapebfimnlniiiahkandclblbUpdate URL:
https://clients2.google.com/service/update2/crx
Extension ID:
jbkfoedolllekgbhcbcoahefnbanhhlhUpdate URL:
https://edge.microsoft.com/extensionwebstorebase/v1/crx
Next, open the Microsoft Intune portal and complete the following steps:
In the Intune Portal, navigate to Devices → Configuration and select Create → New Policy.
In the Create a profile window:
Select a Platform (for example, Windows 10 and later).
From the Profile type dropdown, select Settings catalog.
Select Create.
On the next screen, give your configuration profile a Name and Description and select Next.
On the Configuration settings screen, select Add settings.
In the Settings picker:
For Google Chrome, search for Configure the list of force-installed apps and extensions, select the Google Google Chrome Extensions category, and toggle that option on.
For Microsoft Edge, search for Control which extensions are installed silently, select the Microsoft Edge\Extensions category, and toggle that option on.
Close the Settings picker.
Still on the Configuration settings screen, enable whichever option(s) you chose and enter the retrieved extension ID and update URL, for example:
Deploy browser extensions with Intune Select Next.
On the Scope tags screen, enter any scope you wish to apply to the configuration and select Next.
On the Assignments screen, add and groups or users to the configuration and select Next.
On the Review + create screen, select Create.
Suggest changes to this page
How can we improve this page for you?
For technical, billing, and product questions, please contact support